Pulling The GM 6.5 Diesel
Pulling your 6.5 (or 6.2) mechanically injected diesel is really straightforward stuff. Especially if you have your radiator support and inner fender removed.
With those two things done, now we're ready to rip and tear!
Whether you're just refreshing the rings, putting in new head gaskets, or doing a full-blown rebuild, you'll need that engine on the stand in front of you.
With just an engine stand and simple hand tools, you'll be ready to tackle any work you need on your monster.
Your Rig May Vary
Since all vehicles are different, I won't be able to cover this part in great detail for your specific vehicle of course, but I'll try to cover as much as I can on the '93 I'm working on and these steps will help guide you on your rig.
First we want to take advantage of all that work we did in taking off that inner fender.
- The whole air cleaner assembly should be off from pulling the inner fender
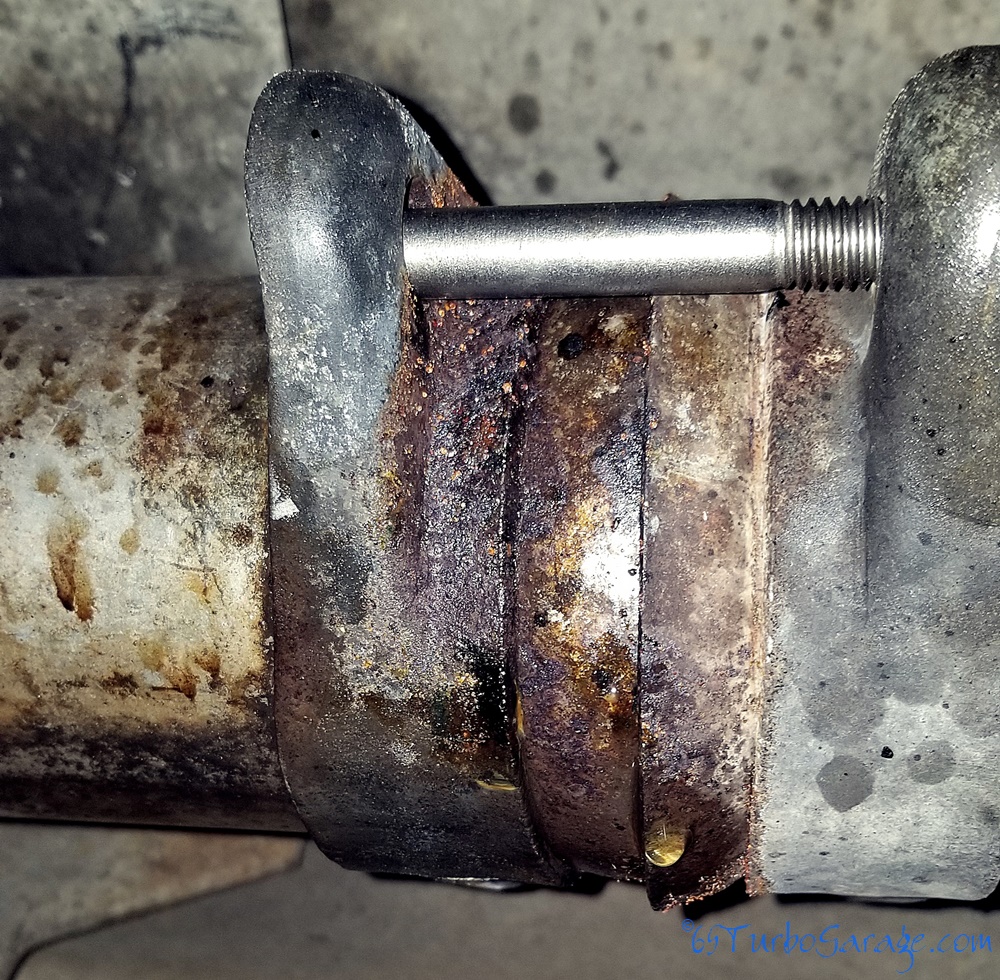
- On the downpipe, loosen the band clamp at the turbo and on my Diamond Eye exhaust, the knuckle joint below and pull the whole thing out
 Disconnect knuckle joint on Diamond Eye exhaust. No, you shouldn't have coolant dripping out of your exhaust!
TIP!
Be careful you don't pull the connectors off of the glow plug wires, needle nose pliers work well for this
- Remove the bolts from the crossover pipe and drop it
- Pull the glow plug wires off
- Remove the nuts on the exhaust manifold holding the glow plug wire protectors and remove the protectors
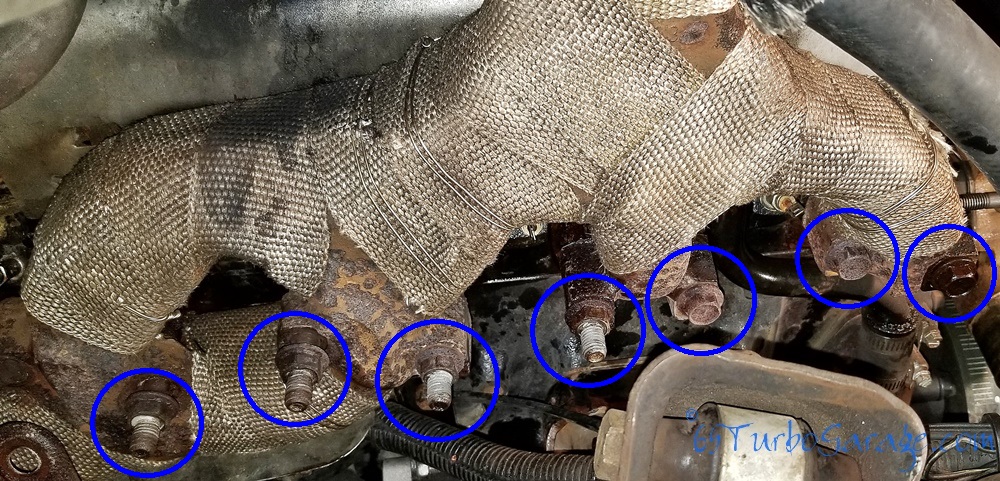
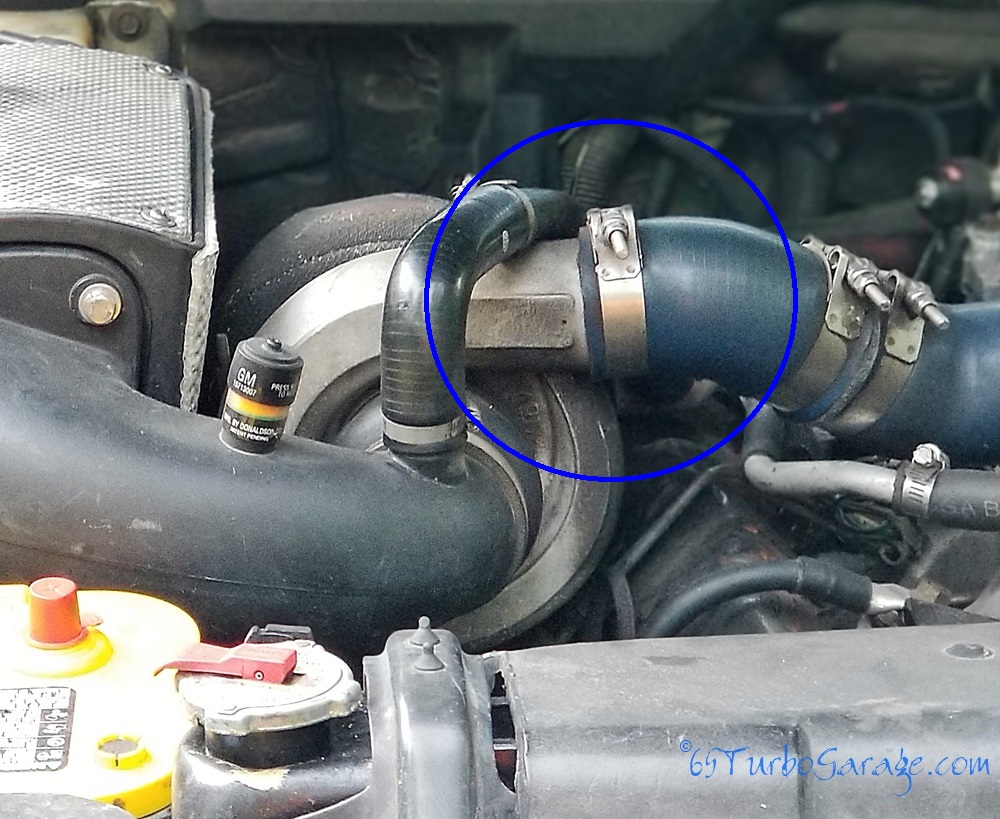
- Remove all studs and bolts from exhaust manifold and loosen the turbo to air plenum connection
- You may have some wastegate connections to remove but with my A-Team turbo, I didn't have to mess with any of that silly stuff : )>
- Loosen the turbo oil supply and drain
- Now pull the whole turbo/exhaust manifold assembly
- If you have sensors and switches and lines and what-not attached to your intake or turbo boost, or water/methanol, label each one with a piece of tape wrapped around them and remove everything
- Remove the power steering pump and set aside. You can see what it takes in my coolant upgrade article here
- Remove the alternator
TIP!
Take plenty of pictures! There is no substitute for being able to see exactly how it was all together before you got your grubby little booger pickers on everything to get it all back together right.
Disconnect:
- Coolant sensor at the drivers side head
- Fuel supply and return
- Throttle cable
- Block Heater
- Oil pressure switch
- Power to glow plug controller
- Starter
- Heater hose to crossover and radiator hoses
- Plug to IP power and coolant sensor on passenger side
- Grounds at passenger head and frame to block (and any others that may have been added)all other various connections for water, electric and fuel
Now everything should be disconnected from the engine so we can start to remove the bellhousing bolts.
Using a 13mm wrench (a pivoting head gear wrench works great here) or socket, remove the nuts on any bellhousing studs that are holding any clamps and with a 14mm wrench, pull the studs free from the engine.
Great! Now all we should have left is the two front motor mounts so wheel your engine hoist into position and hook it up.
- Put just enough tension on the engine to snug up the chains real good and pull the two bolts out of the motor mounts
- You may have to work at it a bit. I had to use a 10mm deep well socket to put pressure on the bolt end while turning it with a socket to get it started out of it's hole
- When they are out, lift the engine up a bit to pull it free
- Now you can start pulling a bit on the engine, wiggling, lifting, pulling. An extra set of hands helps here
- Just keep gently working at it until it is completely free, then pull it over and out of the engine bay
Done!
Now bolt her up to the engine stand, bandage up any bloody knuckles, and go get a beer cause now the real fun starts!

