Champion's 6.5 Turbo Diesel Radiator install
If you've been following along on my cooling series of the standard cooling upgrades and cooling comparison between the stock style radiator and the Champion radiator, you'll know pretty much all you need to know to keep your 6.5 diesel running cool.
Cool? Cool.
But... some of you may not know how to go about getting that rad radiator installed so let's get you up to speed.
No Conversion Necessary
Let me be clear about one thing, I show here how to change the cooling system from the pre-94 system to the 94+ but you won't have to soon. John at Unique Diesel provided advice and the parts to convert but that was only for testing purposes for the cooling comparison and he will have an aluminum radiator available for pre-94 trucks soon. If you want to upgrade, links are provided below to what parts are available.
Let's get this party started!
|
Parts: Pre-94:
All: |
Tools:
|
Cleaners/Sealers:
|
Changing the radiator in a GM 6.5 turbo diesel is one of the easiest maintenance items that you can do, a few bolts, and a few hoses and she's out.
However, we will be adding a bit more to the process because we are upgrading to the 94+ cooling system at the same time.
The first order of business is to remove the old radiator so we'll start with draining...
- I drained the system by putting a large drain pan below the drivers side and pulling the top hose loose using the hose buddy. If you can get to the drain on the drivers side bottom, go for it, I just can never get my fat hands up in there so I do it the quick and dirty way.
- Pull the top hose off using the hose clamp pliers if you still have the compression clamps on there.
- For the older models we'll go ahead and change the thermostat housing so remove the 15mm nuts holding the thermostat housing on and work the housing off. it's likely stuck on pretty good so keep at it. Just be careful not to damage the crossover that it's bolted to since it's aluminum too and scratches easily.
- Make note of how it goes in the housing and pull the thermostat out and clean any gasket material off of it if you are going to reuse it. Now is a good time to change it out if it has been in there a while.
TIP!
Be very careful that the housing is flat without anything under it because you can very easily break off the ears if something is under there while you snug it down.
- Set the thermostat in the housing and line the gasket up with the bolt holes. Many gaskets have a sticky side so pull off the backing and put it towards the housing.
- Put the bolts back in and tighten.
- Re-attach the fuel drain tee.
OK, Now For All Vehicles, We Move On To The Radiator Itself...
- Remove battery cable from fan shroud and push it aside.
- Pull the upper fan shroud off by removing the 10mm screws. There are two right in front and two mid-way down on either side. This is where the long extensions come in handy.
- Once it's loose, pull the shroud up and out.
- Remove the last 10mm bolt on each bracket securing the radiator down.
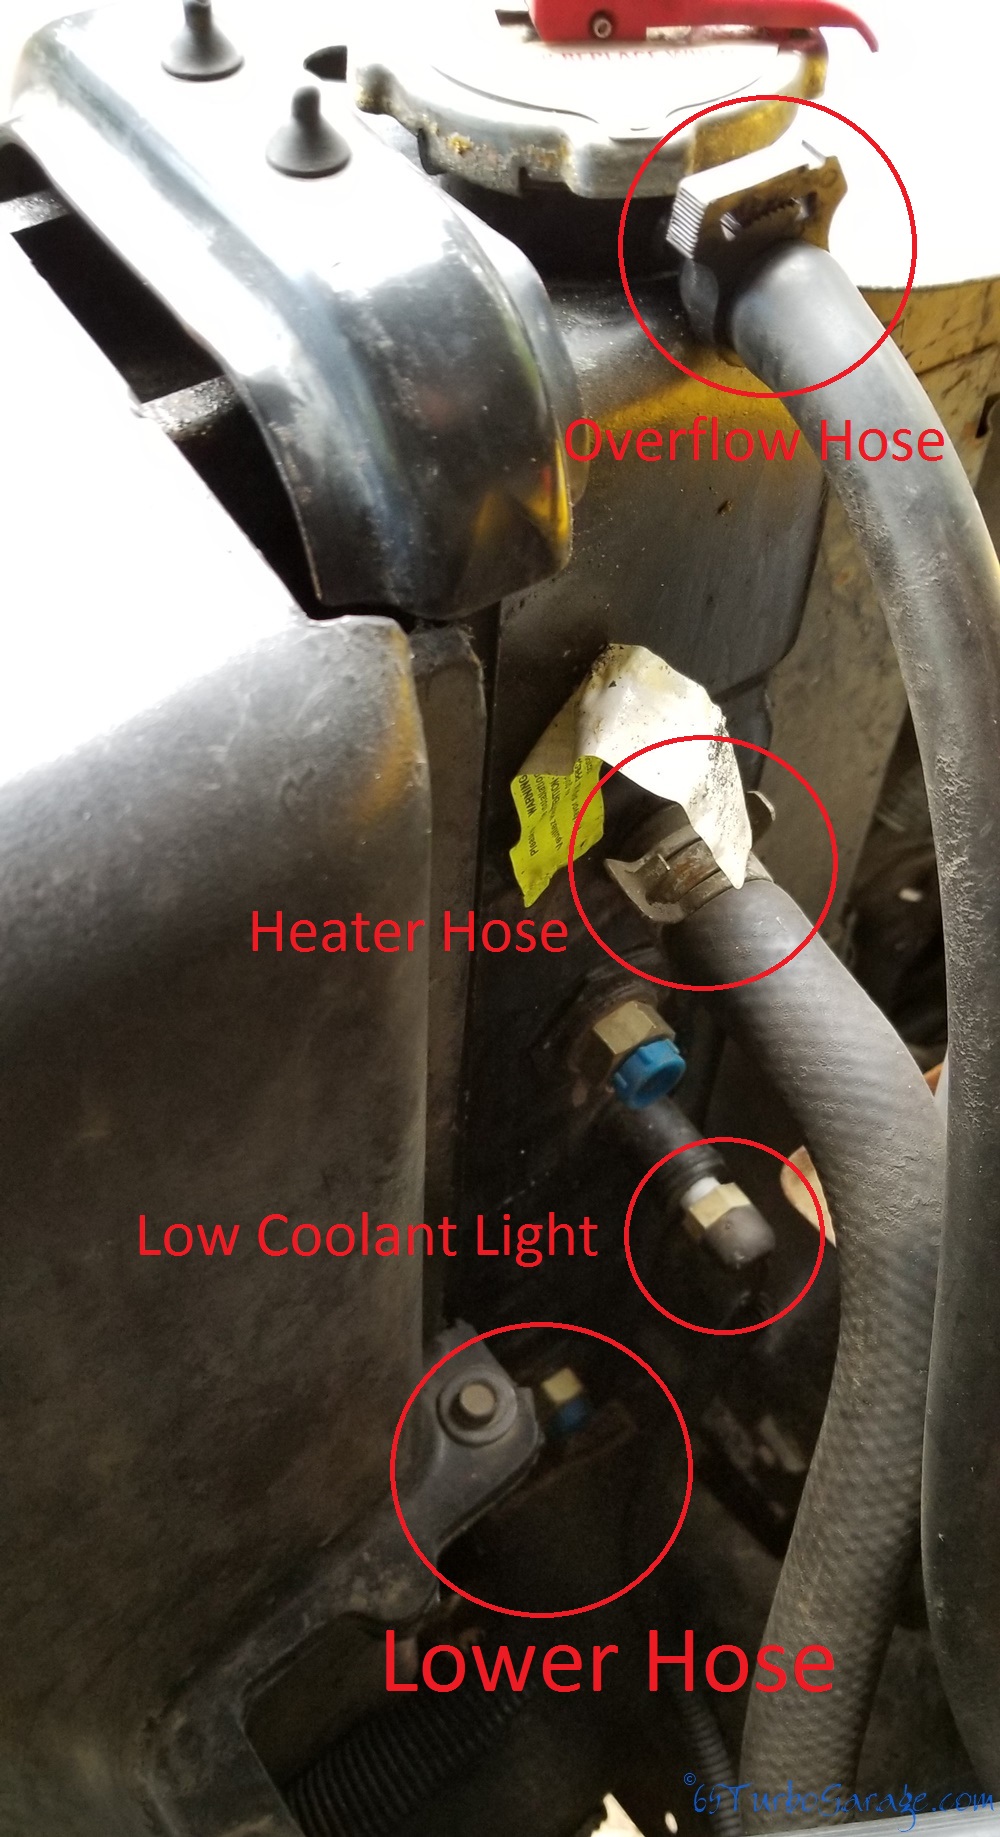
- On the passenger side, remove the lower radiator hose, heater hose, overflow hose, and low coolant connector, it just presses on.
 Remove The Stock Radiator Passenger Side Connections
- For you lazy people with autos, remove the transmission cooler lines as well , they have the blue caps in the picture above. (don't get bent out of shape, I'm only kidding. My '99 has a 4L80E.)
- Now lift the radiator up and out.
Before We Put The Champion Radiator In...
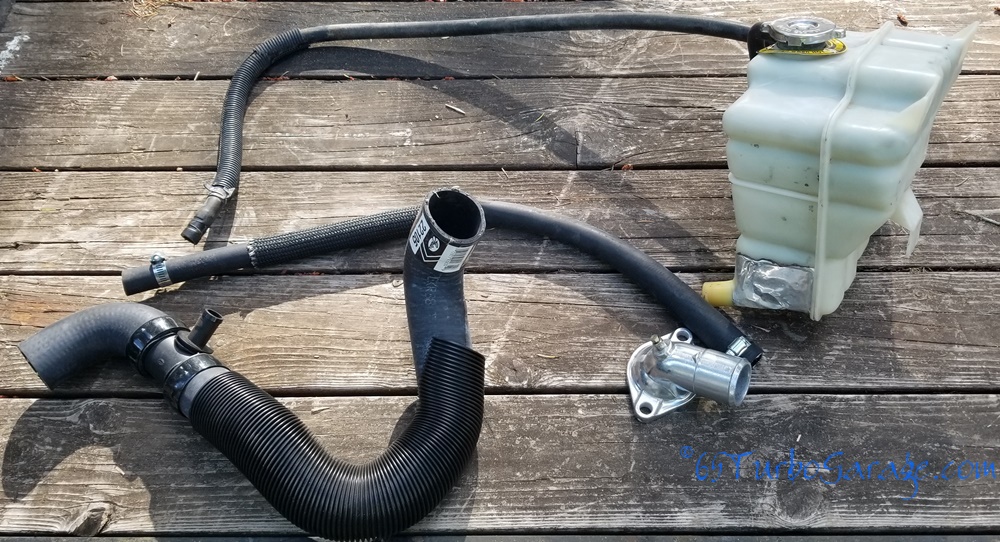
 Radiator Components For Upgrading To 94+ Style
Let's finish up the upgrade to the newer style cooling system...
- At the expansion tank, remove the two 13mm nuts holding it to the firewall.
- Being careful to not leak too much coolant out, pull the overflow hose under the turbo and pull the tank up and out.
- Attach the overflow hose and the coolant feed line to the tank (don't forget to tighten the clamps).
- Slide the heat shield up to the tank (so it can protect from the heat of the turbo and exhaust) and feed the coolant feed line under the turbo and the tank down on it's clip. I found it easier to climb up in the engine bay and get a good look to get the clip lined up.
- Install the tank bolts with some anti-seize.
And that's it for the upgrade.
Now On To The Part We're Really Here For!
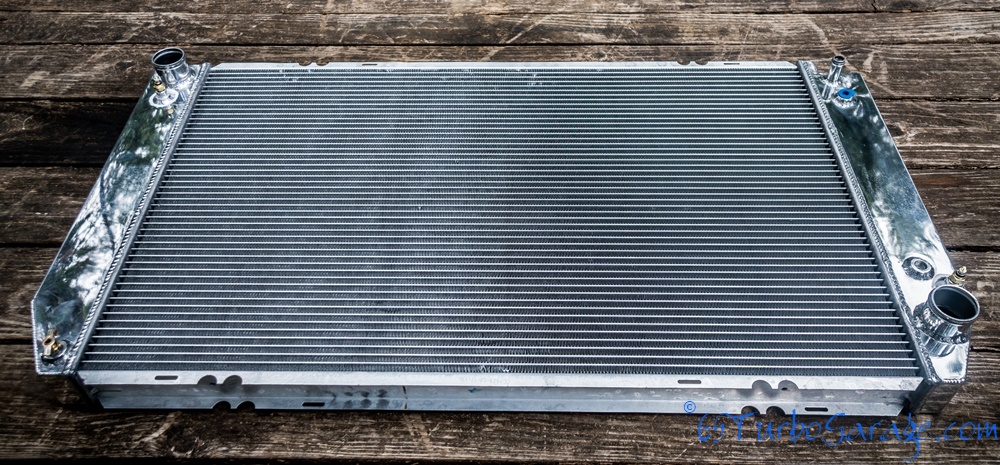
- Carefully slide the Champion radiator down into it's seat, being careful to not whack the fins on anything. If you do, just take a pocket knife or similar and straighten them out a bit. You won't get them perfect, but you just want air to be able to flow over them.
Tip!
Whatever you end up using if you need to, make sure you shim evenly on top and bottom, otherwise your fan shroud won't fit properly.
I found that the Champion radiator fit a little loose in my rig. I don't know if it's because it's a 94+ radiator in a '93 rig or not. I didn't think there was any difference, but either way I talked to Matt at Champion and found that others have found the radiator to be a very tight fit, but never a loose one. I guess it just goes to show you that every rig can be a little different.
For a fix, I just used pieces of garden hose to shim it up to fit. Three on the bottom and three on the top snugged it up real good. I do want something a little better quality that garden hose (even though I've been blamed for being a redneck) so I'll find some better rubber shimming material at some point and shim it right.
- Finish the final attachments, lower radiator hose, radiator fill hose, transmission cooler lines, and heater hose.
Another minor fit issue cropped up with the overflow hose. The nipple it attaches to was too small. I just put two hose clamps on and tightened it down real tight. Champion knows about this as well.
For the low coolant sensor, I just grounded it out to turn off the dash light until I can get a new two wire plug to adapt the old one wire to the new overflow tank. It should just need to have one wire grounded, but I won't be sure until I do it. If you figure it out before I do, come back and let me know how you did it in the comments below!
- Re-install the upper radiator hose
- Re-install the upper fan shroud
- Re-install battery cable
TIP!
This may be a good time to start using distilled water if you haven't. It's very cheap, you can get it at most any grocery store, and it really helps prevent mineral build up in your cooling system over the years. In other words it's crazy cheap insurance.
- Loosen the bleeder on the thermostat housing and fill radiator with a 50/50 mix of coolant.
The final step is to bleed the system. Many people have different ways of doing this. I had the most success by parking on a downgrade so the bleeder is the highest point and pressurizing the system at the cap. you can do this by putting a fitting in an old cap, using a commercial pressurizing system, or just blowing in the top of the overflow tank.
Just make sure you wipe it off good first because, ew.
